Click on an image to make it bigger.
D7 - Working with Content - Webforms - Custom Webform Settings - Edit Email Settings

1. Using Tokens with Webform

The easiest way to describe a token value is to compare it to the self-adhesive nametags that you might use at a convention.  You know, the ones that say, "Hi my name is _______".  Inside of the blank, you would put a person's name.  That blank field is, basically, what a token is. It's a place to store a variable.

We use variables a lot in computing.  We also use them out in the physical world quite a bit.

Every time you fill out a form, you're inserting variables in each and every field.

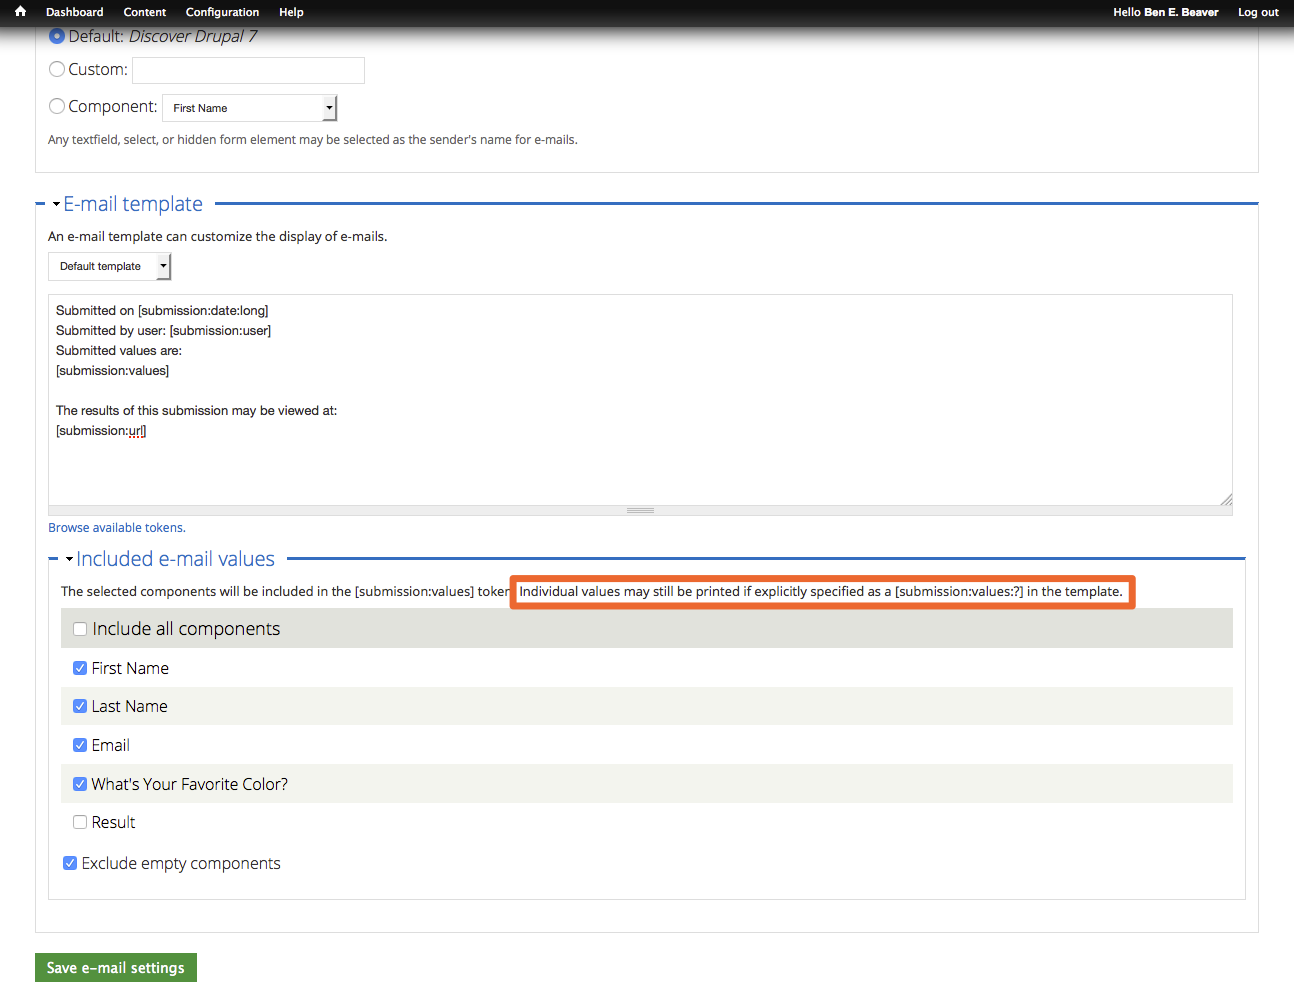
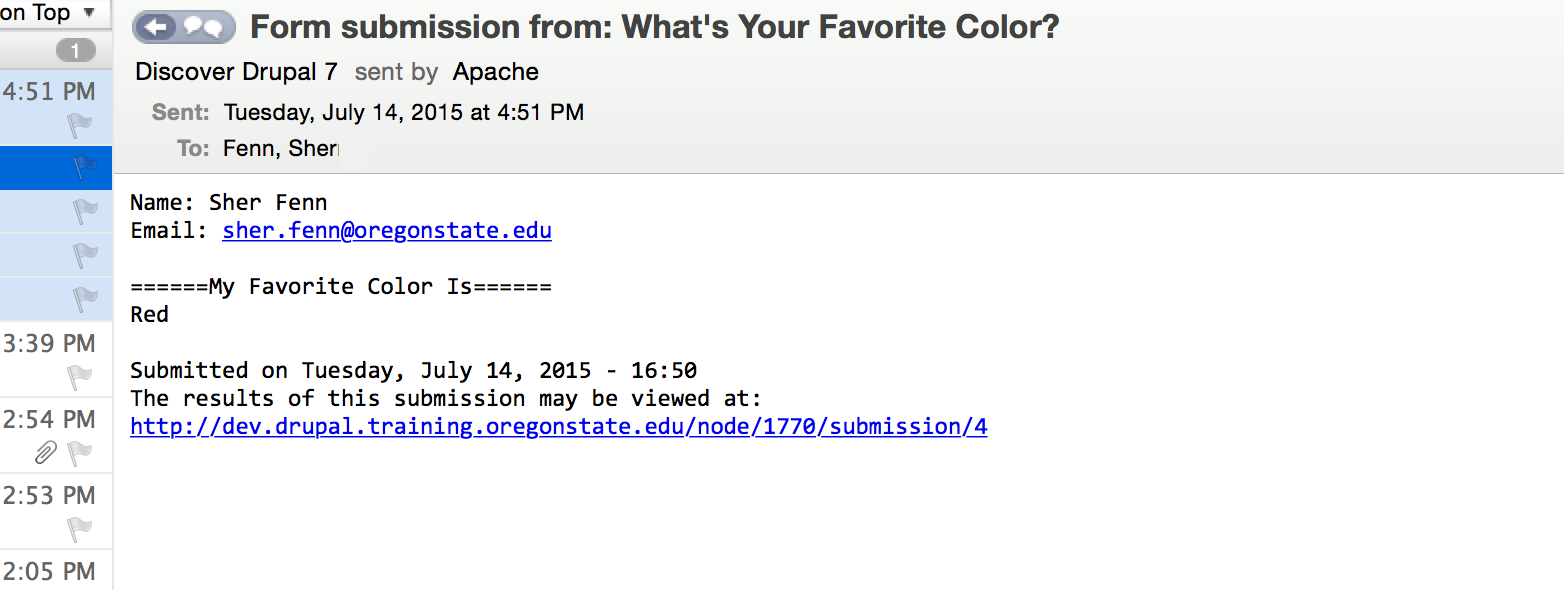
When using Webform, we can actually grab those variables, via tokens, and make them work for us in displays.

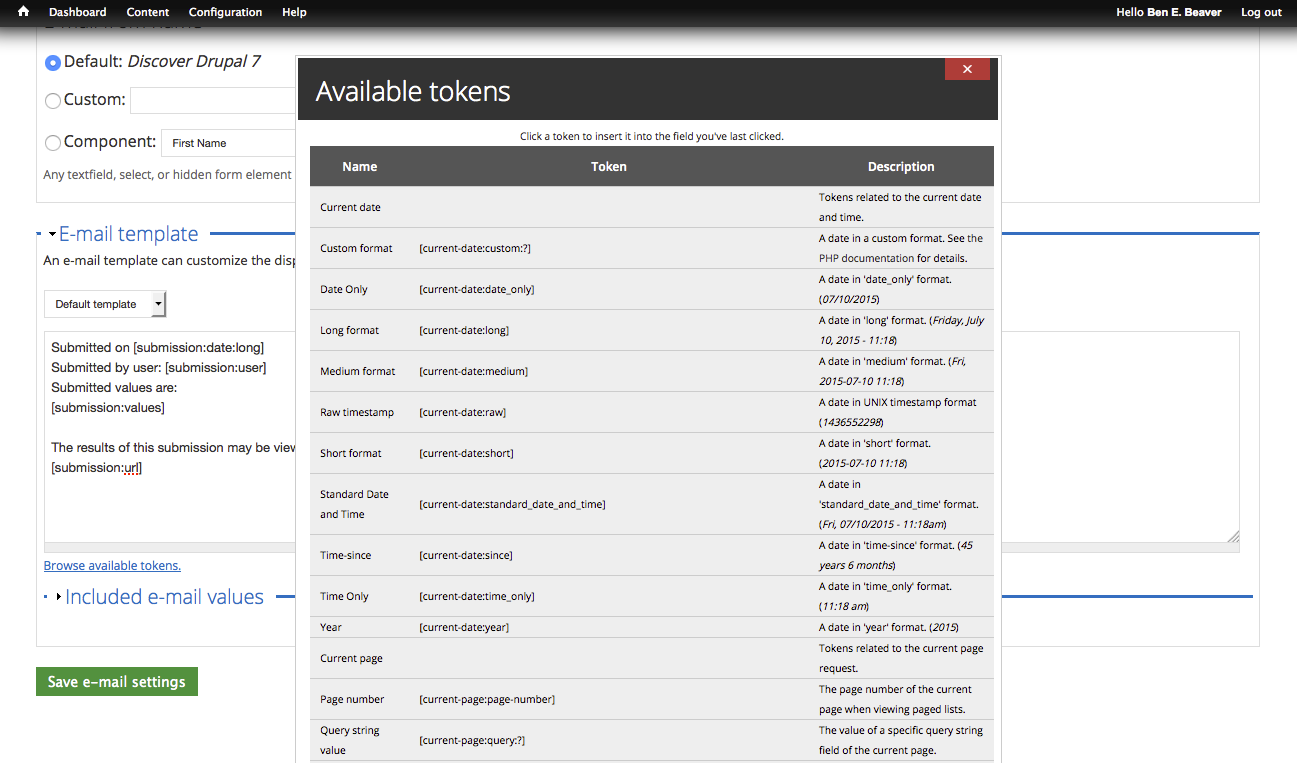
To begin, from within your webform email list, click the Edit link of the email account you wish to configure.
 

D7 - Working with Content - Webforms - Custom Webform Settings - Browse Tokens

2. Searching for Available Tokens

Scroll down to the E-mail Template fieldset.  Directly below the text editor you'll find a small link that says Browse Available Tokens.  Click this.

An Available Tokens list will pop up.  This list is absolutely huge and really difficult to navigate. Go ahead and close the token list, there's an easier way to do this.

D7 - Webform - Configure Email - Instructional Text

3. Inserting Field Values

Scroll down a little bit more and click on the Included e-mail values fieldset to open it. Uncheck all of the component boxes (you can do this by clicking and unclicking the Include all components checkbox).  Ensure the Exclude empty components checkbox is checked.

You'll see a line of text that says Individual values may still be printed if explicitly specified as a [submission:values:?].  This is kind of cryptic. A token, however, is an "insert into blank" kind of thing.  This thing here has a question mark - this is where you need to put field values.

Where can we get those?  Well, we'll need to take a little trip...

D7 - Webform - Configure Email - Go To Form Components

4. Form Components Tab

Copy the URL that you're at, open another tab in your browser, paste the URL in and then click on the Form components tab.

You want to get inside of each of those components to get their Field Keys.  Click the Edit link on the first component.

D7 - Working with Content - Webforms - Custom Webform Settings - Edit Email Settings - Get Field Key

5. Copying Field Keys for Later Use

Once inside the configuration panel for the component, you'll see the Field Key right up at the top.  Copy and paste this into a text editor to hold on to it. Repeat this process for all of the fields that you want to display in your email.

D7 - Working with Content - Webforms - Custom Webform Settings - Edit Email Settings - Customize Template

6. Using Field Keys for Field values

Now come on back to your email template and have some fun.

Get rid of some or all of the default text in your Email template field.  For each field that you want to display in your email, use the [submission:values:?] token, substituting the Field Key name in where the question mark is, as shown below. When you're all done, click the Save e-mail settings button.

D7 - Working with Content - Webforms - Custom Webform Settings - Edit Email Settings - Email With Formatted Textt

7. Check Your Results

Give it a minute or two and then check the email that the webform is supposed to send the mail to.  You'll find a result that's formatted exactly as you want.